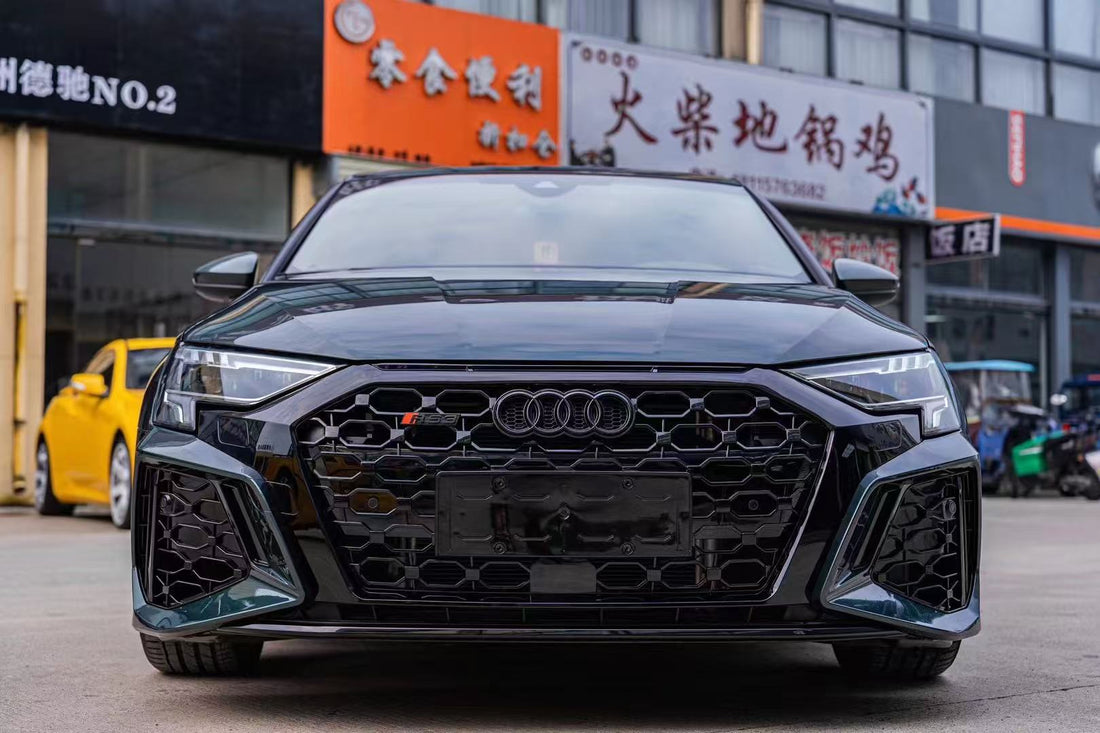
Upgrading an Audi A3 8Y to an RS3 Front Bumper: A Step-by-Step Case Study

Upgrading the front bumper of an Audi A3 8Y to the aggressive RS3-style bumper is a popular modification among enthusiasts who want to give their car a sportier and more dynamic appearance. This blog details the process of a real-world upgrade, highlighting the key steps, challenges, and results. If you're considering this modification, read on to learn more!


Why Upgrade to an RS3 Front Bumper?
The RS3 bumper brings a distinct and aggressive design to the A3 lineup. With larger air intakes, a honeycomb grille, and sharper lines, the RS3 bumper significantly enhances the visual appeal of the A3. Beyond aesthetics, this modification helps owners achieve a more customized and premium look without purchasing an RS model outright.
The Vehicle: Audi A3 8Y
The base vehicle for this project is a 2022 Audi A3 8Y in Daytona Gray Metallic. The owner was seeking a sportier, more head-turning appearance while maintaining factory-quality fit and finish. The RS3 bumper conversion was the perfect solution.
Parts and Tools Needed
Before starting, it's essential to gather all the necessary parts and tools. Here's what was used for this project:
Parts:
-
RS3 Front Bumper Kit: Includes the bumper cover, honeycomb grille, and air intakes.
-
Mounting Brackets: RS3-specific brackets to ensure proper alignment.
-
Fog Lights and Covers: Compatible with the RS3 bumper design.
-
Trim Pieces: Includes grille emblems, parking sensor mounts, and license plate holder (if required).
-
Additional Hardware: Clips, screws, and fasteners that differ from the A3 bumper.
Step-by-Step Installation Process
1. Prepare the Vehicle
Start by parking the car on a flat surface and turning off the engine. Disconnect the battery to ensure safety while handling electrical components like parking sensors and fog lights.
2. Remove the Stock Bumper
Carefully remove the original A3 bumper by following these steps:
-
Unscrew the bolts under the hood and along the wheel arches.
-
Detach the undertray screws.
-
Use trim removal tools to unclip the bumper from the mounting points.
-
Disconnect the parking sensor wiring harness and fog light connections.
3. Test-Fit the RS3 Bumper
Before making any permanent modifications, test-fit the RS3 bumper to ensure alignment with the body panels. Adjust the mounting brackets if necessary.
4. Transfer Components
If your RS3 bumper kit does not come pre-installed with parking sensor mounts or fog light assemblies, transfer these components from the original bumper. Be sure to secure them properly to avoid malfunction.
5. Install the RS3 Bumper
Once everything is aligned and transferred, attach the RS3 bumper to the car. Follow these steps:
-
Secure the bumper to the mounting brackets and tighten all screws.
-
Reconnect the parking sensors and fog light wiring harnesses.
-
Check for proper fitment and ensure no gaps between the bumper and body panels.
6. Reassemble and Inspect
Reattach the undertray, wheel arch liners, and any remaining screws. Double-check all connections and tighten as needed. Finally, reconnect the battery and test the parking sensors and fog lights to ensure functionality.
Challenges Faced
-
Sensor Compatibility: The parking sensors required slight modifications to fit the RS3 bumper mounts. Ensuring they were secure and functional took extra time.
-
Bracket Alignment: The RS3-specific mounting brackets needed minor adjustments to fit perfectly with the A3 frame.
-
Color Matching: Although the bumper was pre-painted, blending it seamlessly with the car’s original paint required some polishing.
The Final Result
The upgraded RS3 bumper completely transformed the appearance of the Audi A3 8Y. The aggressive styling elements, such as the honeycomb grille and large air intakes, gave the car a much more dynamic and sporty look. Fit and finish were excellent, maintaining the factory aesthetic while standing out as a unique modification.
Conclusion
Upgrading an Audi A3 8Y to an RS3 front bumper is a rewarding project for any car enthusiast. While the process requires attention to detail and some technical know-how, the results are well worth the effort. Whether you’re looking to enhance your car’s aesthetics or simply stand out on the road, this modification delivers in every aspect.
If you’ve undertaken a similar project or have questions about the process, feel free to share your thoughts in the comments below!
